Anime image background removal: saliency detection and matting
Posted on May 12, 2014
Hi, my name is Alexis, I’m french and a Ph.D. student in computer vision at Kyushu University, Japan. I want to use this blog to document my research in a way that is (hopefully) more informal, pedagogical and interactive than a scientific paper :) .
The focus of my studies is the analysis of anime images, i.e. the kind of artwork you can find in communities such as Pixiv and deviantArt. One of the goals I want to reach is the automated identification of characters in a color image - think facebook face tagging except for anime.
Background removal
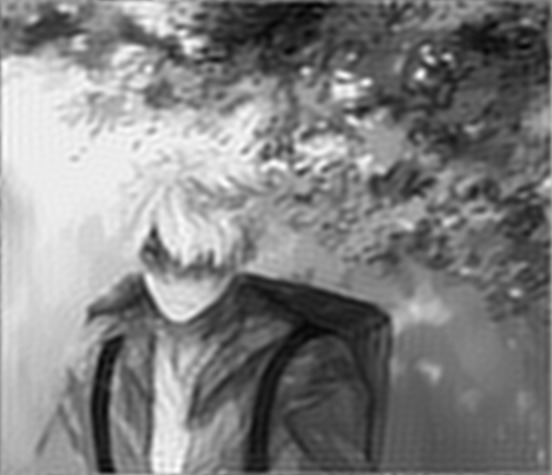
Unlike the face of a human being, the facial features of an anime character are not really sufficient for identification. There is simply too much variation across artists and drawing styles for that to be practical. So we’d like to get information from the entire body of the character - or whatever parts of the body happen to be in the image :p - for identification.


However, chances are the character is superimposed over some kind of background. This background rarely ever contains information relevant to character identification, so we would like to remove it as a first step. Background removal, also referred to as foreground extraction and matting, has been extensively studied in the case of natural images. There is, however, little literature about background extraction for artificial images of any kind. A well known matting algorithm called GrabCut is implemented in OpenCV, so I first tried that and it turned out to give surprisingly decent results for anime images.


One of the issues with using GrabCut on its own is that it requires some kind of mask or bounding box for the object of interest. In the context of web artist communities, this means more user input, which is undesirable. We would like to automatically locate the objects which stand out - or are more salient. This is appropriately called saliency detection in the computer vision literature, and - like matting - it has mostly been applied to natural images.
I chose to study the saliency detection method by Hou et al. called spectral residual saliency, as it is one of the most computationally efficient - only requiring a couple of 2D fast Fourier transforms, some filtering and standard linear algebra operations. Many methods perform better on benchmarks compared to eye tracking data, however for my purposes a very rough saliency map will do just fine - GrabCut takes care of the rest.
Spectral residual saliency for anime images
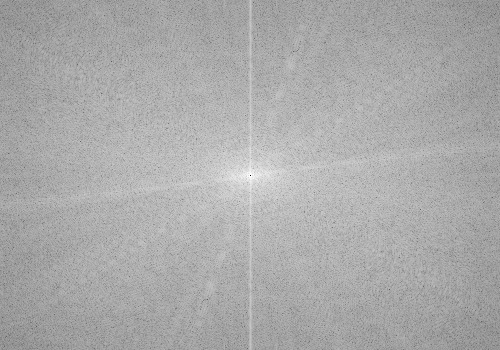
This saliency detection method relies heavily on the Fourier transform, so here is a brief rundown of the properties we are interested in for this article. The Fourier transform, Fourier spectrum or just spectrum of an image \(I\) is a complex valued image \(F(I)\) of the same dimensions as \(I\). In a precise sense, the Fourier transform encodes information about patterns in the image according to the frequency at which they repeat - the further you go from the center of the spectrum, the higher the frequency. There is also an inverse Fourier transform \(F^{-1}\) which reverses a Fourier transform into the original image, i.e. for any image \(I\), \(F^{-1}(F(I)) = I\). The magnitude spectrum of an image \(I\) is the absolute value of its Fourier transform, \(|F(I)|\).

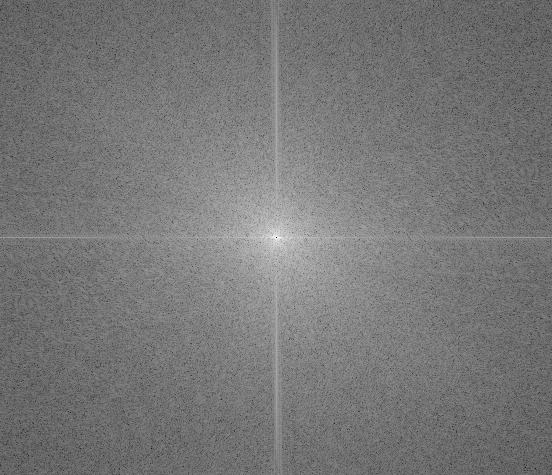
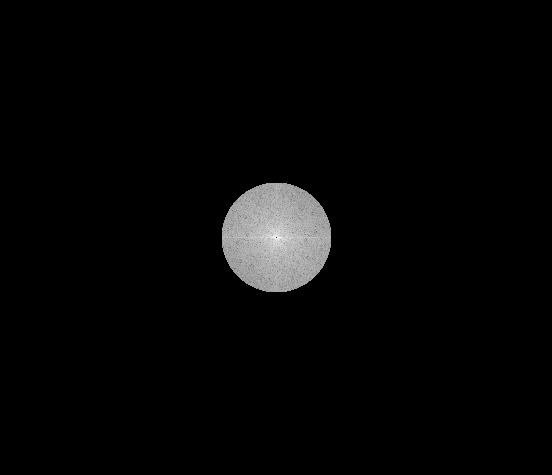
Basically, spectral residual saliency detects the “spikes” in the log magnitude spectrum, and says those “spikes” correspond to salient elements in the original image. To do that, it first “smooths out” the log magnitude spectrum to get its general trend, and just takes the difference between the original and the “smoothed” one. Using an inverse Fourier transform on this difference (after a bit of complex number trickery I won’t get into :p), one gets the corresponding objects in the source image - what we call a saliency map.

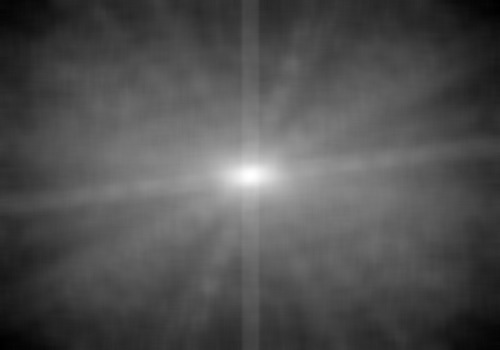
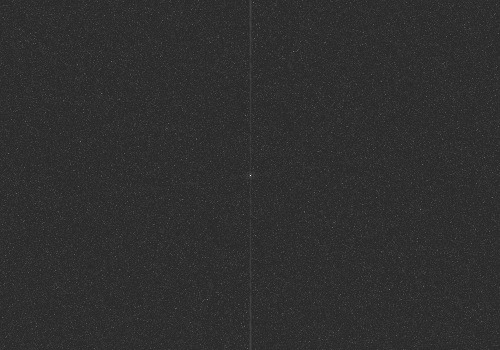
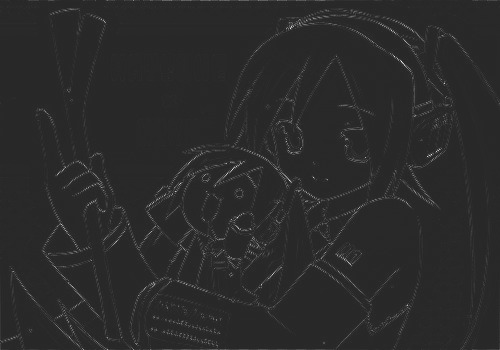
The raw saliency map seems to detect the edges of the character well. However, it fails to take into account large patches of homogeneous color on the character itself, and picks up isolated edges in the background. Blurring out the saliency map with a Gaussian filter as the original paper suggests solves both issues. Benchmark data also shows that blurrier saliency maps perform better on natural images, and this result seems to carry to animation images.
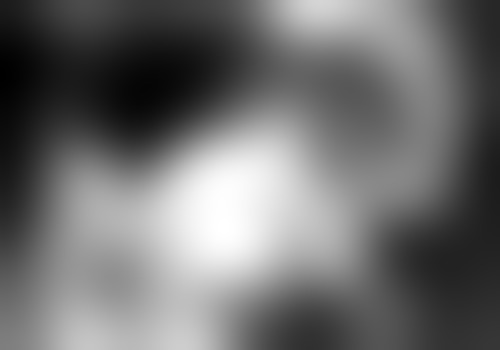
After blurring, some maps still fail to account for the character in the image, picking up irrelevant text, sharp background objects and foreground frames, often on the sides of the image. Like photos however, the area of interest tends to be in the center of the picture. We therefore add a simple 2D Gaussian to the middle of the image in order to introduce a center bias. This has been shown to improve saliency results in the case of natural images, and it seems that anime images follow this trend too.


The implementation of GrabCut in OpenCV then expects a mask indicating what is “probably background” and “probably foreground”. To do this, we simply threshold the saliency map - if the saliency of a pixel is below a certain value, then it’s probably background. Otherwise, it’s probably foreground. From there, GrabCut does a remarkable job without further user inputs :) .
Dealing with color using principal component analysis
The previous algorithm, however, only works on grayscale images, as there is no such thing as a Fourier transform of a color image. Which is a shame, as most anime images are colored. The creators of the spectral residual saliency method suggest applying the algorithm to each RGB color channel individually, then combine the resulting saliency maps into one somehow. I’m however not a big fan of RGB, and I’ll be working using CIE \(L^*a^*b^*\) color, which usually has much better properties for computer vision tasks. Indeed, RGB is essentially intended for digital display, and as a color space doesn’t have such great properties - namely, if you take 2 RGB values \((r_1,g_1,b_1)\) and \((r_2,g_2,b_2)\) and compute the Euclidan distance between them, this doesn’t really tell you anything about how a human would perceive the 2 colors comparatively.
However, \(L^*a^*b^*\) was designed specifically so the Euclidean distance between colors tells you something - if it close to 0, then the colors appear almost the same to the human eye. If it is big, then it means a human would be able to distinguish them easily. Since anime images were designed to be viewed by non-colorblind humans this can be a meaningful metric.
Anyway, running saliency detection on each color channel is still not guaranteed to be very meaningful even in \(L^*a^*b^*\) color space. So my first idea was to find the best possible conversion to grayscale for a given image, the one that would keep the most information about the original image. Converting a color image to grayscale is a special case of what we fancy computer scientists call dimensionality reduction, as we go from 3D (RGB or \(L^*a^*b^*\)) to 1D. A very well-known dimensionality reduction method is called principal component analysis (PCA), and so I tried that out.
Essentially, PCA takes a bunch of points in space - 3D space in our case - and finds the orientation of this bunch of points. This orientation can be defined as the direction at which the points show the most variation from the average. So if we project all the points on the line defined by this direction, we get the 1D data (a point on a line) which preserves the most variation among these points. Translating this to image vocabulary, if we apply PCA to \(L^*a^*b^*\) pixel values in our image, we get new grayscale pixel values which preserve the most variation in human perception - as that is what variation in \(L^*a^*b^*\) color space means in some sense.
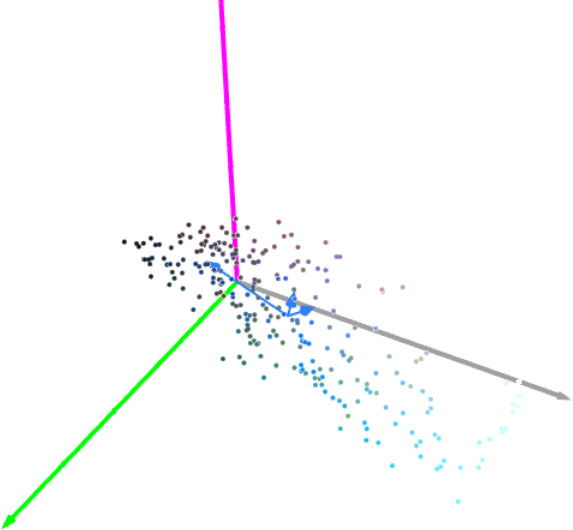
So, we have an optimal grayscale conversion, cool ! We’re still wasting information - i.e. all the variation that’s not along this line we found. It turns out that PCA can allow us to - optimally - project 3D data in 2D space, and even 3D space, which allows us to capture more information about the original. Let me explain.
Let’s identify the first direction we found by a vector, which we’ll call \(V_1\). This vector already accounts for all the data that’s parallel to it, so what we’re really interested in what’s left. It follows that what’s left is whatever is orthogonal to \(V_1\). In 3D space, that’s a plane called the orthogonal plane, and so we can project our data on this plane to obtain 2D data. As I mentioned earlier, PCA not only works on 3D data but also 2D data, so we can apply the same process once again to find the orientation of the data in this 2D plane, which we’ll represent with a vector \(V_2\). And we can repeat the process one more time, taking the space that’s orthogonal to both \(V_1\) and \(V_2\), which is just a 1D line - which follows our last vector \(V_3\). Since we’re in 3D space, and those 3 vectors are orthogonal to each other, all the information in the image is kept by projecting data along these 3 vectors - which give us 3 channels, i.e. a new color image.
So we now have a color space in which each channel capture the most variation in the original image, so it kind of makes sense to apply spectral residual saliency to each channel separately. This, however, still doesn’t tell us how we should combine the 3 resulting saliency maps. It turns out that we accidentally found that information along the way: PCA also tells us exactly how much each of the vectors \(V_1\), \(V_2\) and \(V_3\) contribute to the variations in pixel value with real numbers \(x_1\), \(x_2\) and \(x_3\). So it makes sense to combine the corresponding saliency maps - which we’ll call \(S_1\), \(S_2\) and \(S_3\) - by weighting them by these values into an average final saliency map \(S\):
\[S = \frac{x_1S_1 + x_2S_2 + x_3S_3}{x_1 + x_2 + x_3}\]
What’s next?
In this article, I’ve outlined the results of my research so far on background removal for anime images. I will soon run benchmarks comparing how these different methods perform, and how much each additional “trick” brings to background removal quality. Further details into the method developed, as well as benchmark results and analysis, will be included in an upcoming paper.
In future work, I will study and apply object detection methods to improve the current method. I hope to detect the face, arms, legs and other features of the character in order to better locate it in the image, and subsequently get better background removals.
Acknowledgments and thanks
This blog is based off the kickass Lambda Oinks by Oinkina who very kindly allowed me to fork the source code of her blog :) . I’d also like to thank my advisor Sakamoto sensei, many of the ideas in this article originated from his fertile mind. Huge thanks to Joseph Kochmann, Hugo Duprat and Matthias Paillard for their help with writing and helping make this blog post more accessible.
All the anime images in this post were found on deviantArt, and I do not own the rights to any of them or to the characters depicted. It is my hope that artists and copyright holder will understand that no harm is intended as their usage here is purely pedagogical. Please don’t sue me :p . Seriously, if you want me to remove any of the images here, please contact me, and it will be done shortly.